As an Executive, you have made decision to modernize your applications and you have shown the courage to transition your applications from monolithic to Micro-services pattern. Those are all good investment decisions and you are leading the pack to save your company money and time to market your product. You went further and chosen Kubernetes Orchestration to deploy your micro-services apps. Are you not ready to monitor your Kubernetes infrastructure and Containerize applications when you have spent millions already? If you don’t have plans to monitor your infrastructure and applications, you may be one of them who likes Las Vegas! Likely chances are you will run into challenges and it is better to be prepared for.
Okay, so much of intro! Let’s see how we can use APM tool like AppDynamics to monitor Kubernetes Nodes/PODs as well as Applications running in containers. The following diagram illustrates the deployment scenario for Kubernetes Visibility:
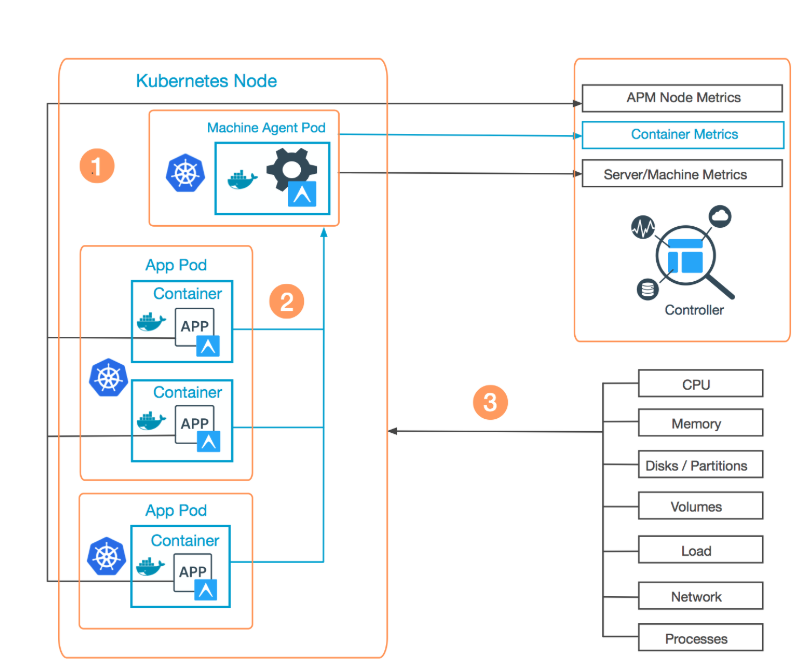
- Install a Standalone Machine Agent () in a Kubernetes pod.
- Install an APM Agent () inside each container in a pod you want to monitor.
- The Standalone Machine Agent then collects hardware metrics for each monitored container, as well as Machine and Server metrics for the host (), and forwards the metrics to the Controller.
You can read the complete details on AppDynamics page on Kubernetes Visibility but we are going to focus on how to do those 1-2-3!
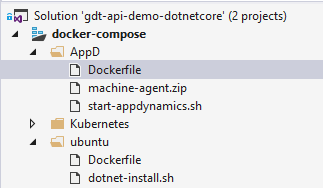
First, login to your AppDynamics SaaS controller and go to your application (create new if it does not exist) and configure Server (Linux, 64bit, etc.). Download the machine agent bundle (example: machineagent-bundle-64bit-linux-4.4.3.1214), rename the ZIP file to machine-agent.zip (no need to extract files) and save the zip file to a working folder. Let’s call the working folder as AppD. We need 3 files in AppD folder- Dockerfile, machine-agent.zip and start-appdynamics.sh.
Let’s look what’s in the Dockerfile:
# Sample Dockerfile for the AppDynamics Standalone Machine Agent # This is provided for illustration purposes only FROM ubuntu:14.04 # Install required packages RUN apt-get update && \ apt-get upgrade -y && \ apt-get install -y unzip && \ apt-get clean # Install AppDynamics Machine Agent ENV MACHINE_AGENT_HOME /opt/appdynamics/machine-agent ADD machine-agent.zip /tmp/ RUN mkdir -p ${MACHINE_AGENT_HOME} && \ unzip -oq /tmp/machine-agent.zip -d ${MACHINE_AGENT_HOME} && \ rm /tmp/machine-agent.zip # Include start script to configure and start MA at runtime ADD start-appdynamics.sh ${MACHINE_AGENT_HOME} RUN chmod 744 ${MACHINE_AGENT_HOME}/start-appdynamics.sh # Configure and Run AppDynamics Machine Agent # start-appdynamics.sh end of the line cracter must be LF (not CRLF) # You can use notepadd++ (edit>EOL Conversion) or dos2unix (on Unix machine) # to change the end of line format CMD "${MACHINE_AGENT_HOME}/start-appdynamics.sh" |
Dockerfile references start-appdynamics.sh. So, we copy start-appdynamics.sh to AppD folder.
#!bin/bash # Sample Docker start script for the AppDynamics Standalone Machine Agent # This is provided for illustration purposes only # Enable using container ID as host ID when the pod has more than one containers MA_PROPERTIES +=" -Dappdynamics.docker.container.containerIdAsHostId.enabled=true" # Start Machine Agent ${MACHINE_AGENT_HOME}/jre/bin/java ${MA_PROPERTIES} -jar ${MACHINE_AGENT_HOME}/machineagent.jar |
We are ready to build machine agent image. Open command line interface(cmd) and change the directory to AppD. Run the following command to build and tag docker image-
docker build . --tag k8s-ma |
We have the machine agent image but how do we transport to Kubernetes nodes? One of the way to do is- push the image to a repository. I am using Azure Container Registry (ACR). So, we are going to tag it one more time and push to ACR.
docker tag k8s-ma gdtapidemodocker.azurecr.io/appd-machine-agent:k8s-ma az acr login --name name-of-ACR docker push gdtapidemodocker.azurecr.io/appd-machine-agent:k8s-ma |
Now, we are ready to deploy machine agent as DeamonSet in Kubernetes. We would need three configurations to deploy the agent: cluster-read-all.yaml, k8s-agent-readall-role-binding.yaml and sim-k8s-agent.yml (actual file name can be anything). You can save them any folder you want. One depends on another. So, you will need to run them in sequence!
cluster-read-all.yaml:
kind: ClusterRole apiVersion: rbac.authorization.k8s.io/v1beta1 metadata: name: cluster-read-all rules: - apiGroups: - "" - apps - autoscaling - batch - extensions - policy - rbac.authorization.k8s.io resources: # everything except secrets - componentstatuses - configmaps - daemonsets - deployments - events - endpoints - horizontalpodautoscalers - ingress - jobs - limitranges - namespaces - nodes - pods - persistentvolumes - persistentvolumeclaims - resourcequotas - replicasets - replicationcontrollers - serviceaccounts - services verbs: - get - watch - list - nonResourceURLs: ["*"] verbs: - get - watch - list |
k8s-agent-readall-role-binding.yaml:
kind: ClusterRoleBinding apiVersion: rbac.authorization.k8s.io/v1beta1 metadata: name: k8s-agent-readall-role-binding subjects: - kind: ServiceAccount name: default namespace: default roleRef: apiGroup: rbac.authorization.k8s.io kind: ClusterRole name: cluster-read-all |
k8s-agent.yml (replace the ?? with your value from controller):
apiVersion: extensions/v1beta1 kind: DaemonSet metadata: name: sim-k8s-agent namespace: default spec: template: metadata: labels: name: appdynamics spec: containers: - env: - name: APPDYNAMICS_CONTROLLER_HOST_NAME value: "??" - name: APPDYNAMICS_CONTROLLER_PORT value: "443" - name: APPDYNAMICS_CONTROLLER_SSL_ENABLED value: "true" - name: APPDYNAMICS_AGENT_ACCOUNT_NAME value: "??" - name: APPDYNAMICS_AGENT_ACCOUNT_ACCESS_KEY value: "??" - name: APPDYNAMICS_SIM_ENABLED value: "true" - name: APPDYNAMICS_DOCKER_ENABLED value: "true" image: gdtapidemodocker.azurecr.io/appd-machine-agent:k8s-ma name: sim-k8s-agent volumeMounts: - mountPath: /hostroot name: hostroot readOnly: true - mountPath: /var/run/docker.sock name: docker-sock volumes: - name: hostroot hostPath: path: / type: Directory - name: docker-sock hostPath: path: /var/run/docker.sock type: Socket restartPolicy: Always |
To avoid permission issue when pulling the image from ACR, I did SSH to one of the Kubernetes nodes in Azure. Azure allows you to run the shell from portal as well. By default, you don’t have permission to write to /home/user-name folder but you can grant yourself. I had to create a new user and reset password from Azure portal. You can change the permission from WinSCP as well. Why permission? We have to take those three configurations and save it to one of the nodes. Hence, all the hassle!
You can run the following commands at the SSH prompt. Allow enough time to complete individual command and you can verify status from Kubernetes dashboard.
kubectl apply cluster-read-all.yaml kubectl apply k8s-agent-readall-role-binding.yaml kubectl apply k8s-agent.yml |
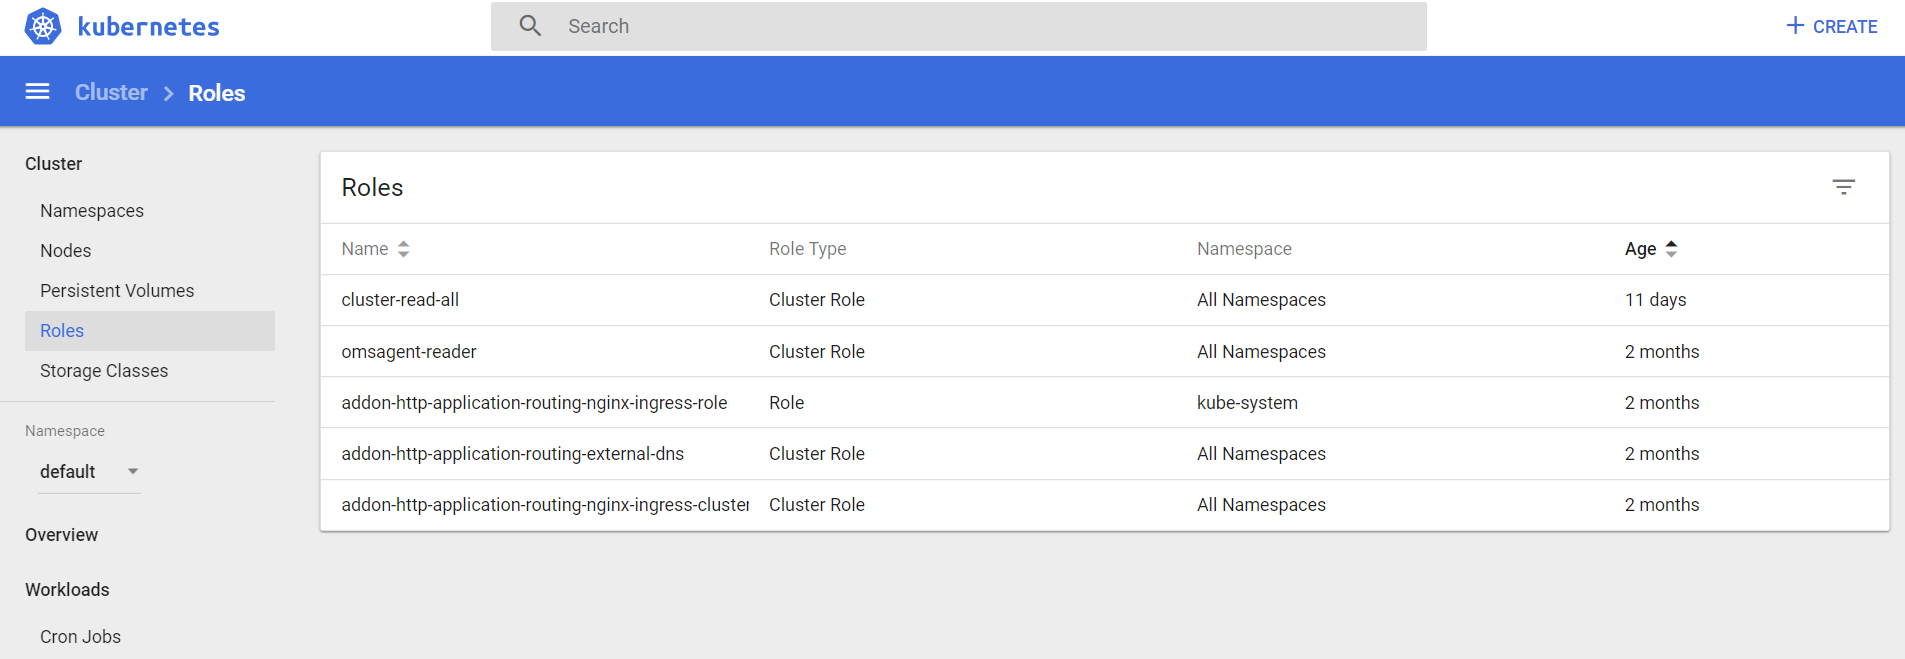
Let’s verify the status of our deployment in Kubernetes Dashboard in Azure-
Yes, our Cluster Role is there!
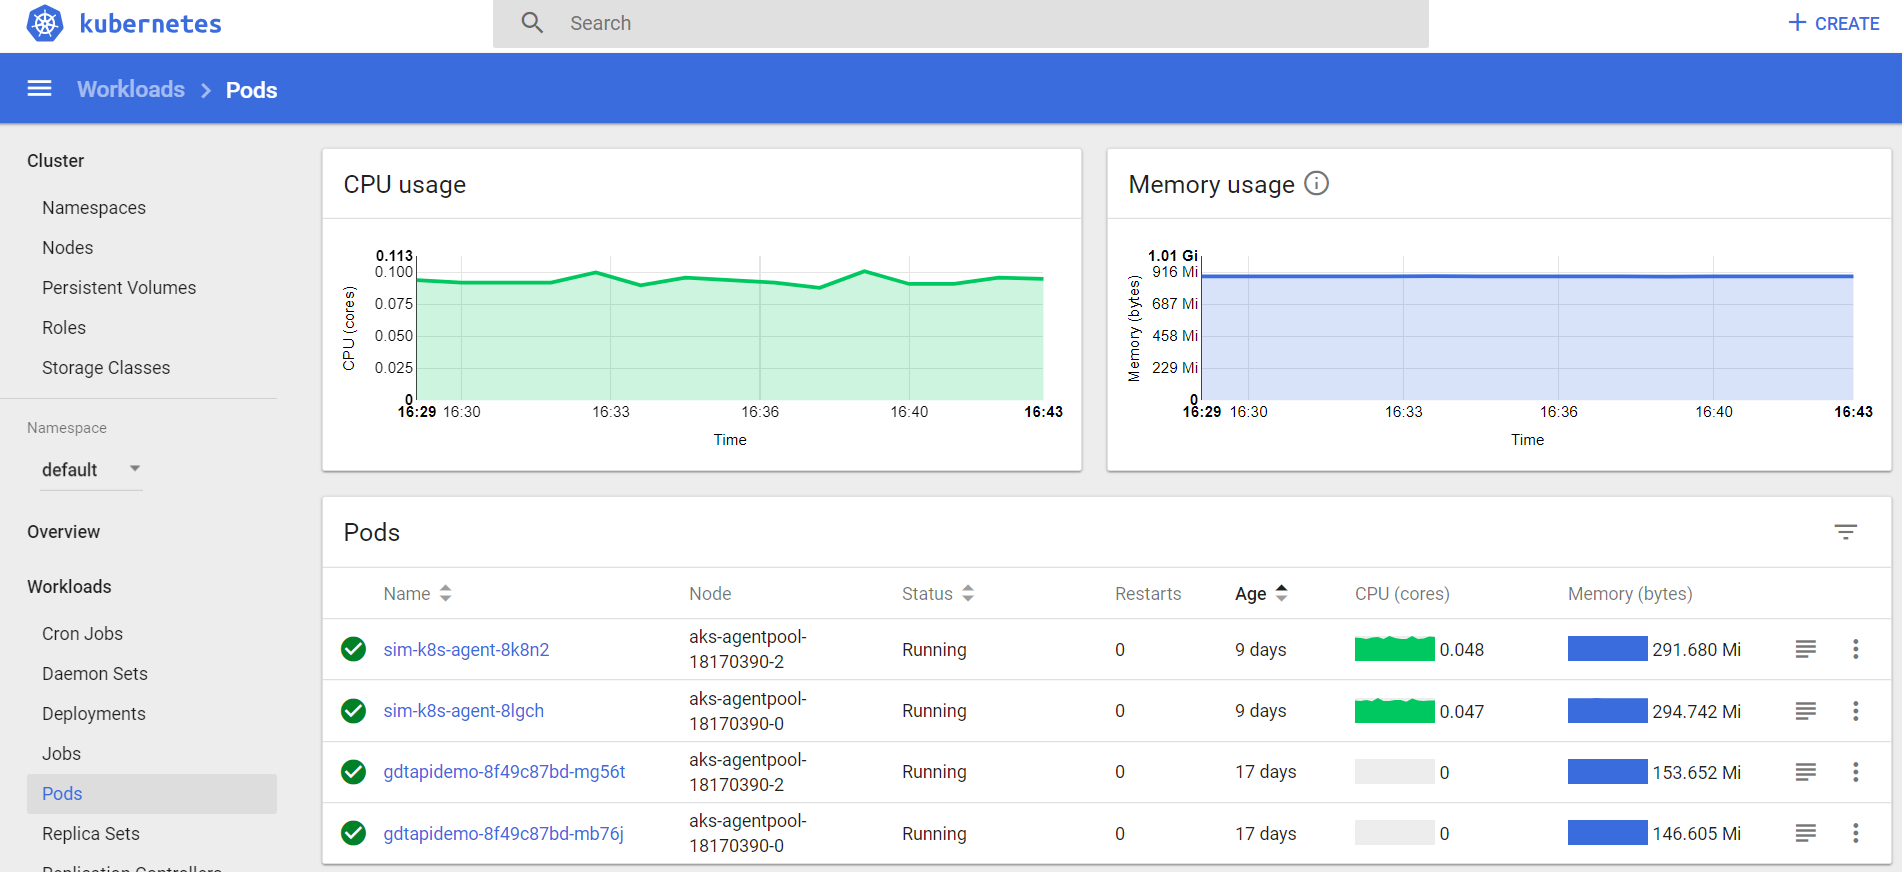
Deamonset deployment looks successful!
We can see AppDynamics machine agents are deployed to every POD in Kubernetes cluster! We have two PODs but you can deploy to many PODs without extra effort.
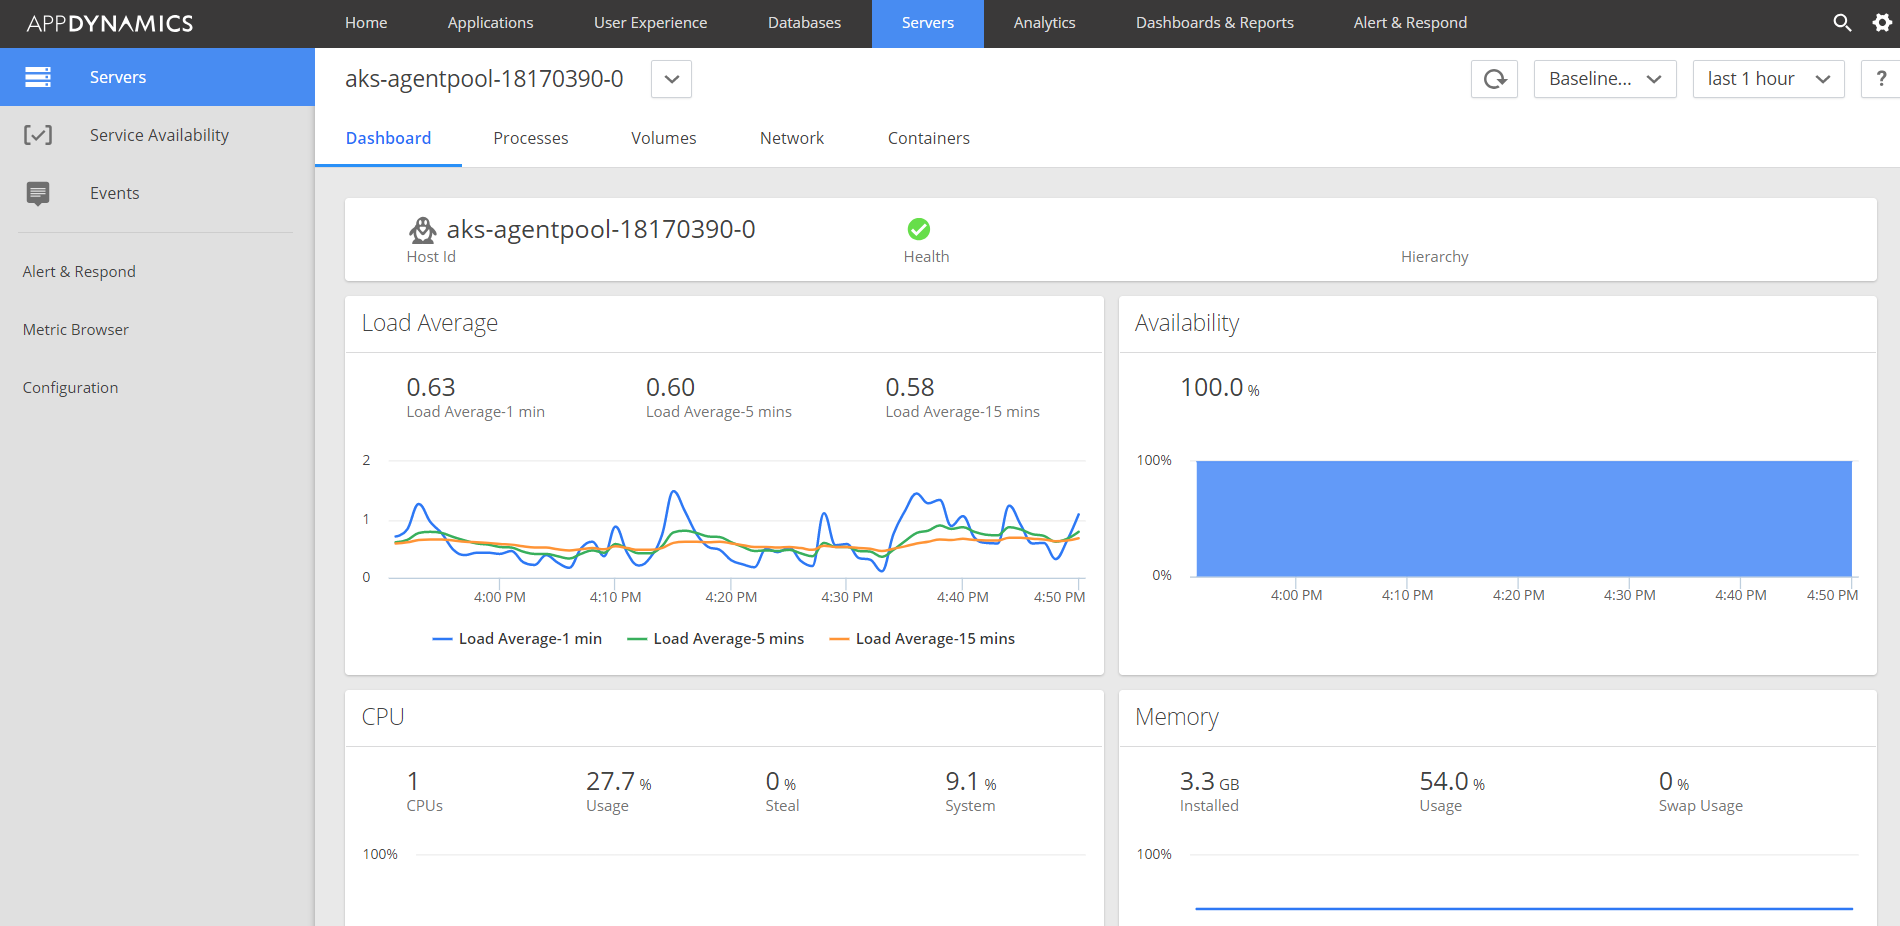
Okay, we spent do much energy to configure and deploy machine agents to Kubernetes cluster. Let’s see how they are monitoring and helping us!
Monitored Servers:
Overall status of Node-0:
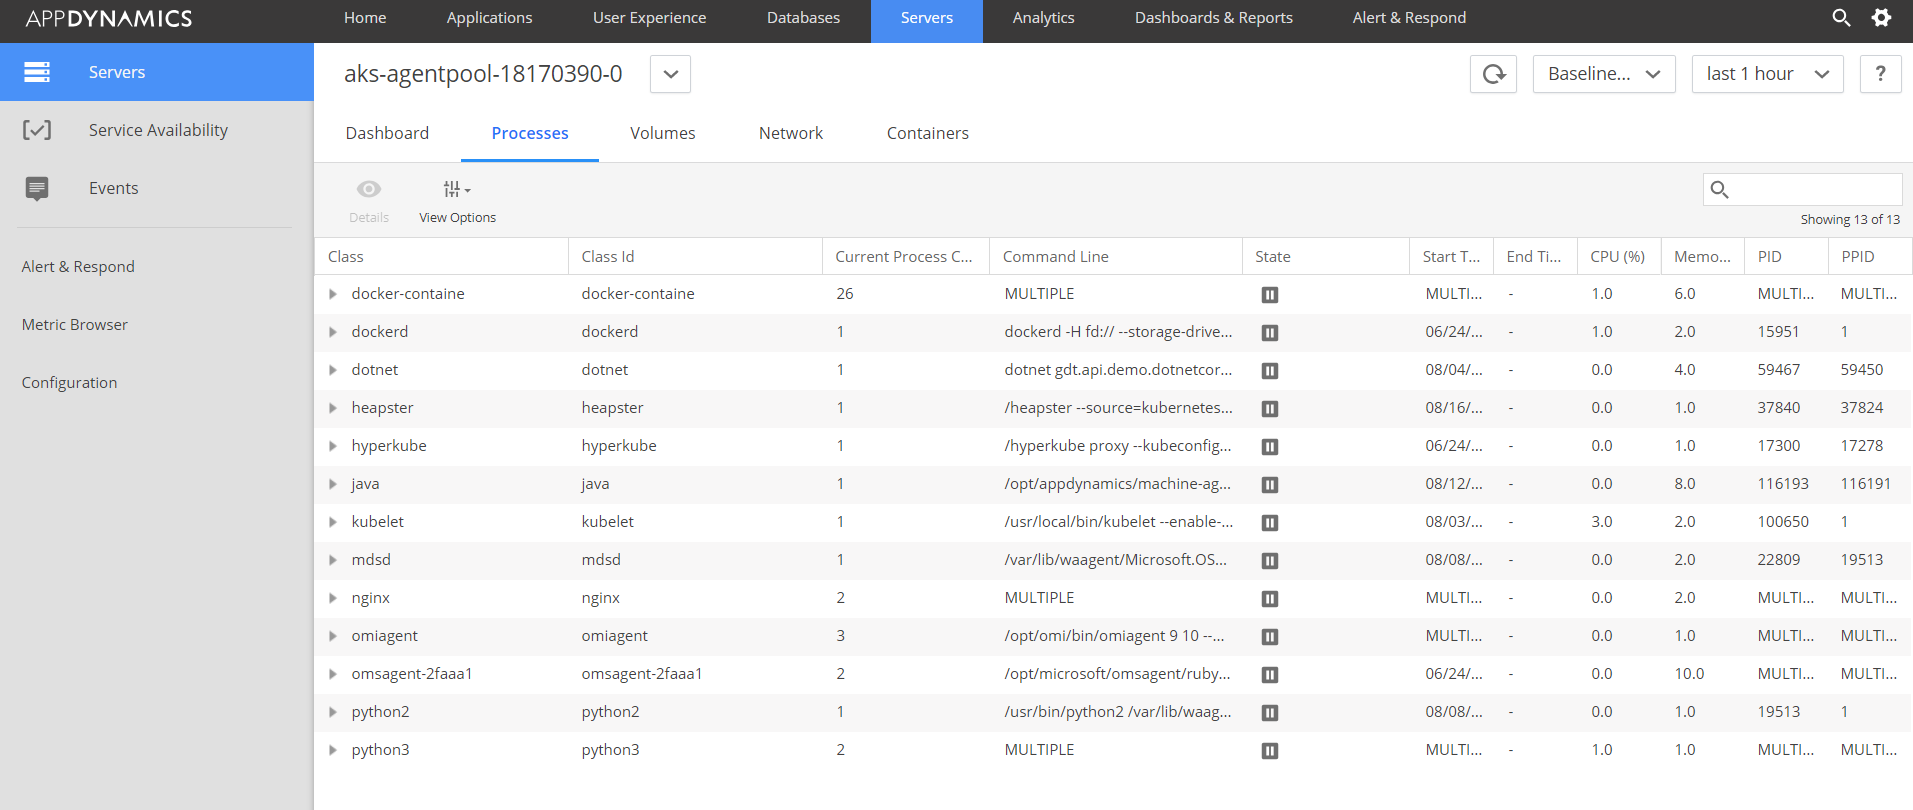
Processes running in Node-0:
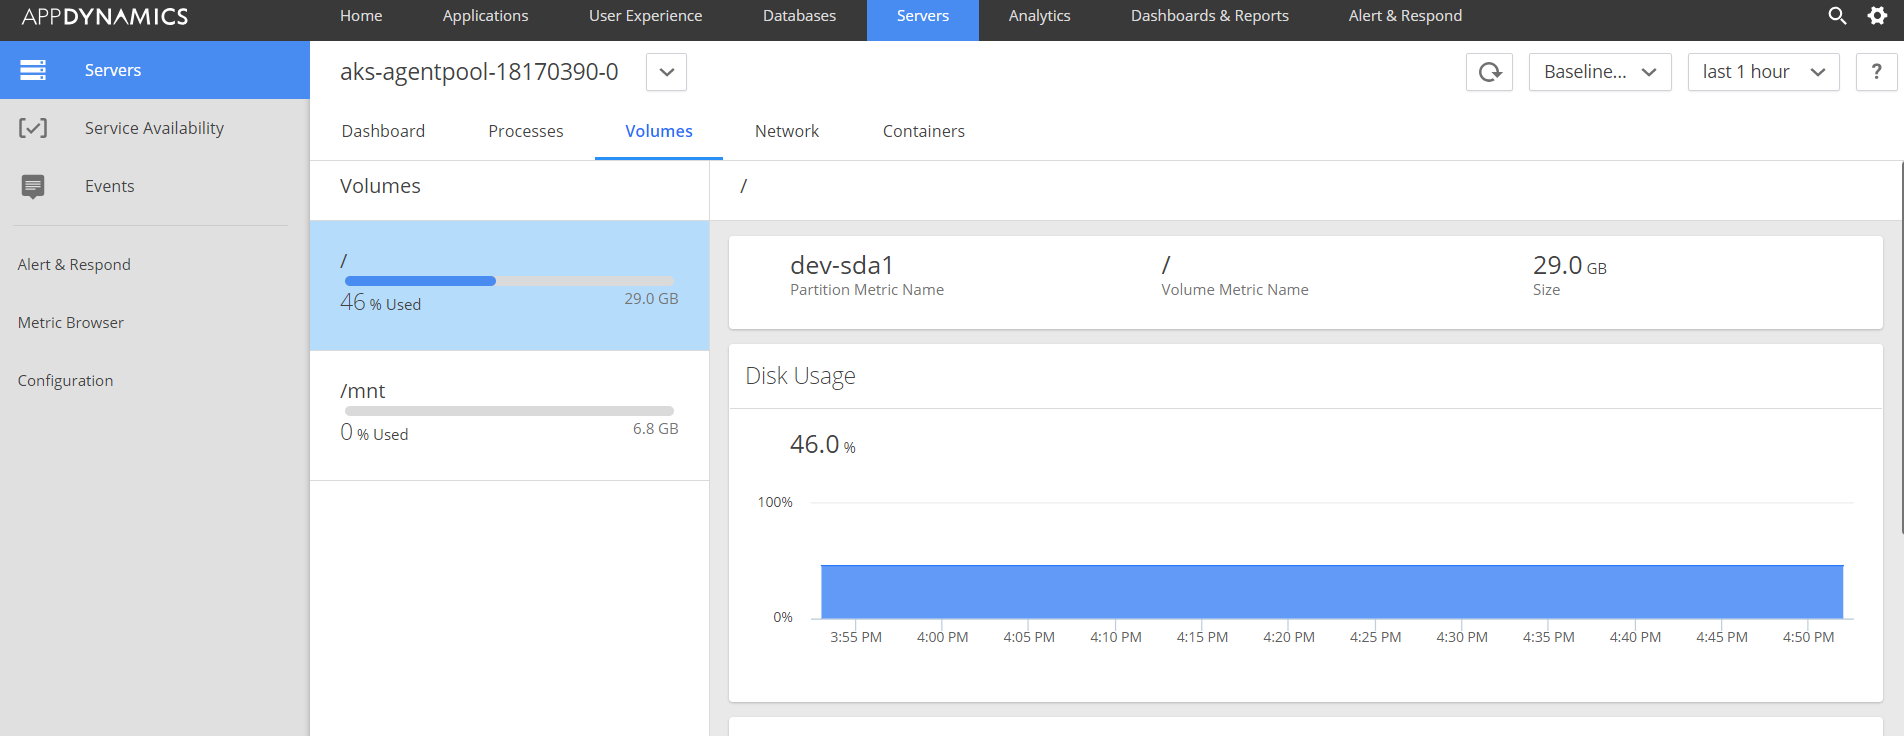
Volume status on Node-0:
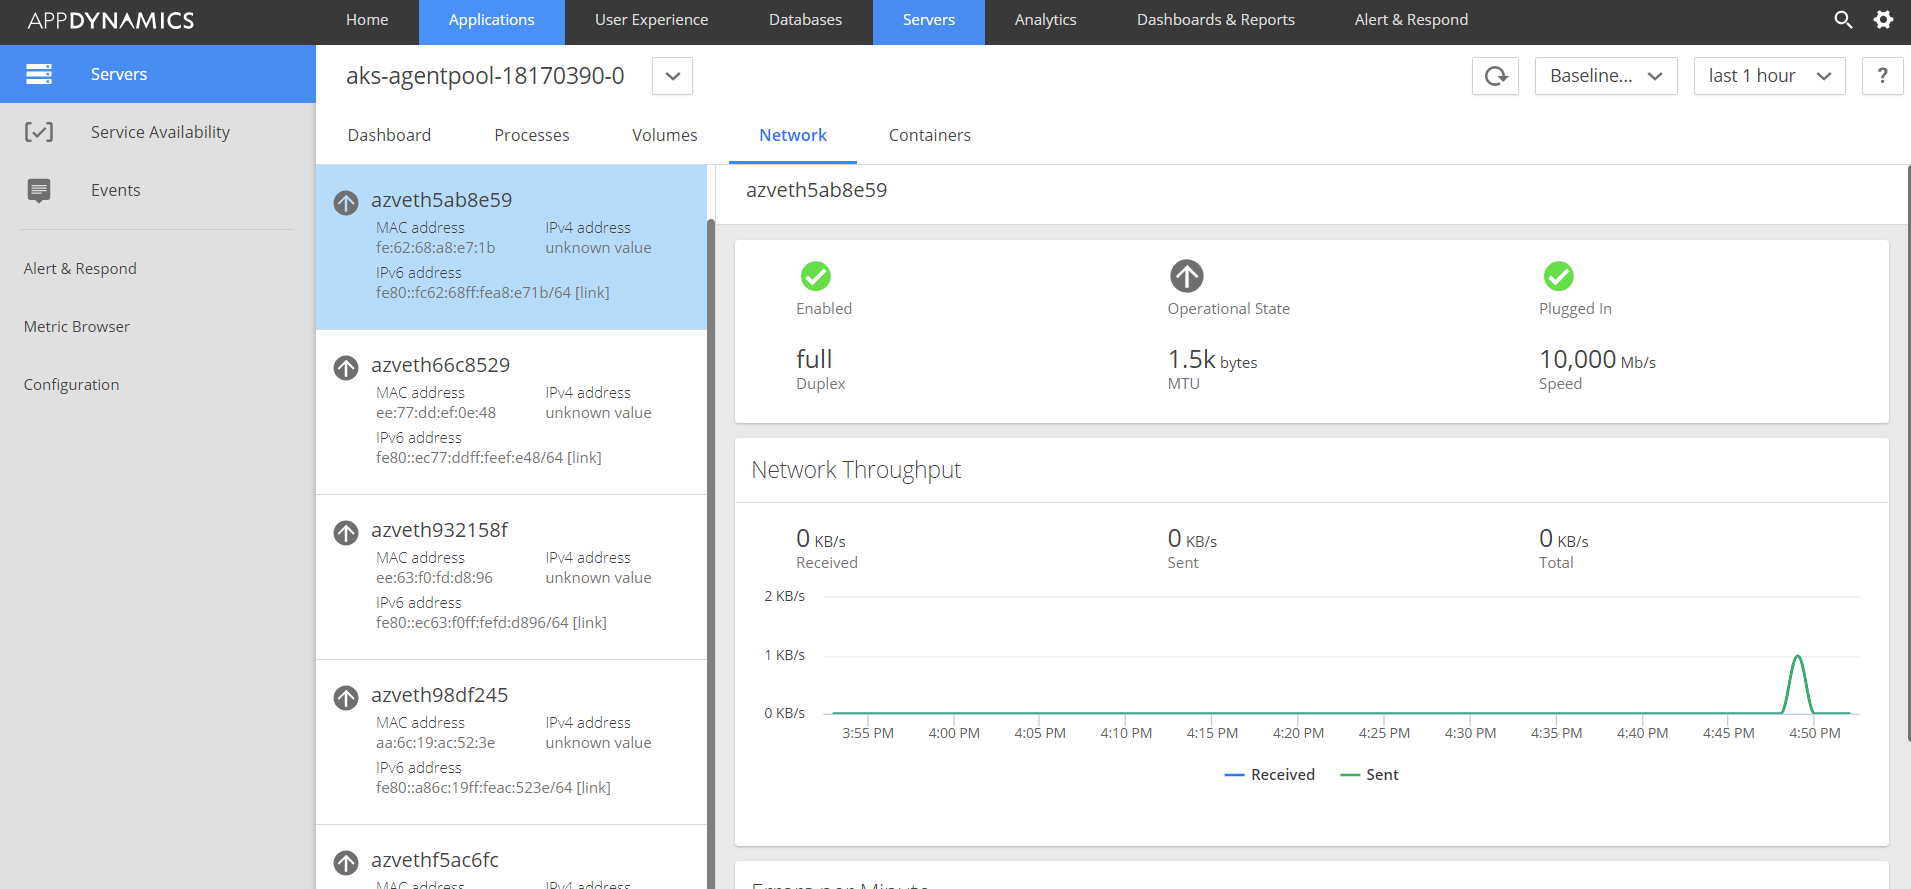
Network status in Node-0:
We are able to monitor Kubernetes infrastructure using standalone machine agent. You can setup rules and alerts to notify your command center if/when things go wrong. Save money and complexities by investing in APM to protect your big investments.
I am going to share how to instrument AppDynamics APM to monitor ASP.NEt Core Applications running in Kubernetes containers (on Linux OS) in my next article.

