Cloud Governance is top most priority of organizations moving (or moved) to Public Cloud. Identity and Access Management (IAM) is an important pillar of the governance. You must know and be in control of every identity used in the Cloud environment and you must know who has access to what. On top of it, you need to be able to control those access from a central area. In this post, we are going to demonstrate how to control access to AWS resources from an external identity provider (IdP).
Some of the design goals-
- Control Access for Federated Personas (users) to all aws accounts.
- There is zero IAM user account in any aws account. This way, access is always controlled by identity federation.
- Users get permission via on-premise AD group. AD group is mapped to IAM role in corresponding aws accounts. Permission is revoked by removing users from AD group.
- Enforce Conditional Access including MFA when authenticating users with higher privileges.
- User gets access to AWS Account(s) just requesting membership of one or more AD groups. Reverse is true when access needs to be revoked.
What IdP to choose? Many organizations are using O365 for Digital Workplace and they are syncing identities in Azure AD. Azure AD is powering billions of identities around the world for customers and it’s resilient in terms of high availability and in terms of security. It’s likely that organization is already paying for required licenses for Azure AD advance features. So, Azure AD is our obvious choice for IdP for AWS SSO.
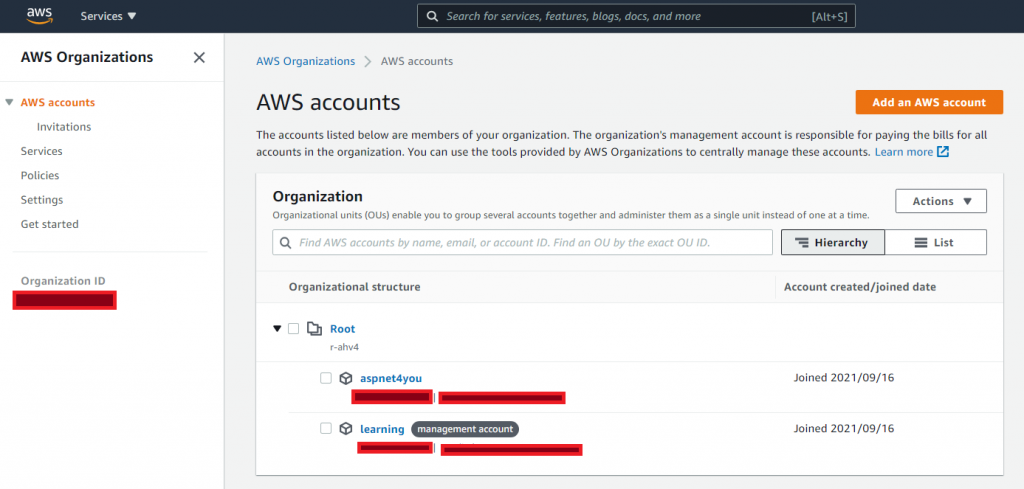
AWS Organization, is a prerequisite since we want to control access to all aws accounts from a management account. If you haven’t setup AWS Organization, you can do so following getting started. AWS Organization should look like the following-
Once you have the AWS Organization and selected the management account, you can start AWS Single Sign-On (SSO) in the management account. A good place to start – Azure AD SSO integration with AWS Single Sign-on. You need to login to AWS Console and Azure Portal with administrator role in side by side tabs in a browser. AWS is our Service Provider (SP) and first step is to get SP metadata from AWS SSO settings.
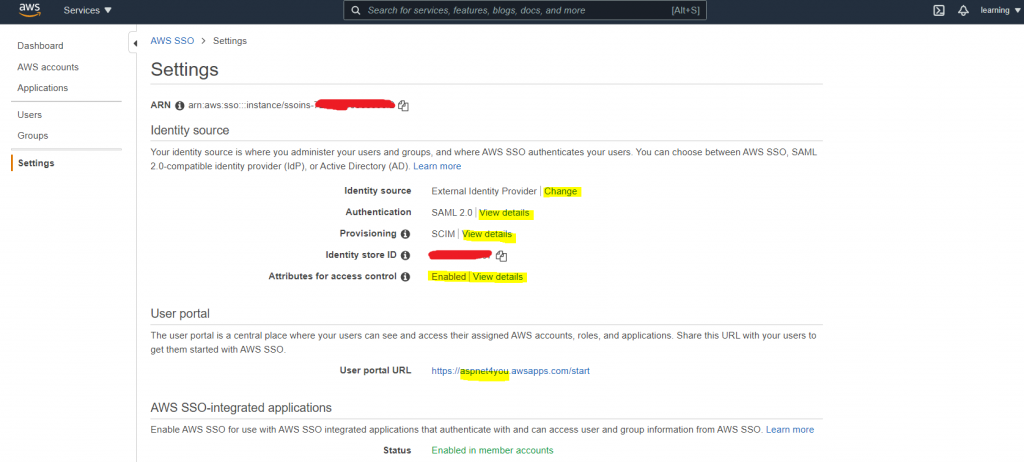
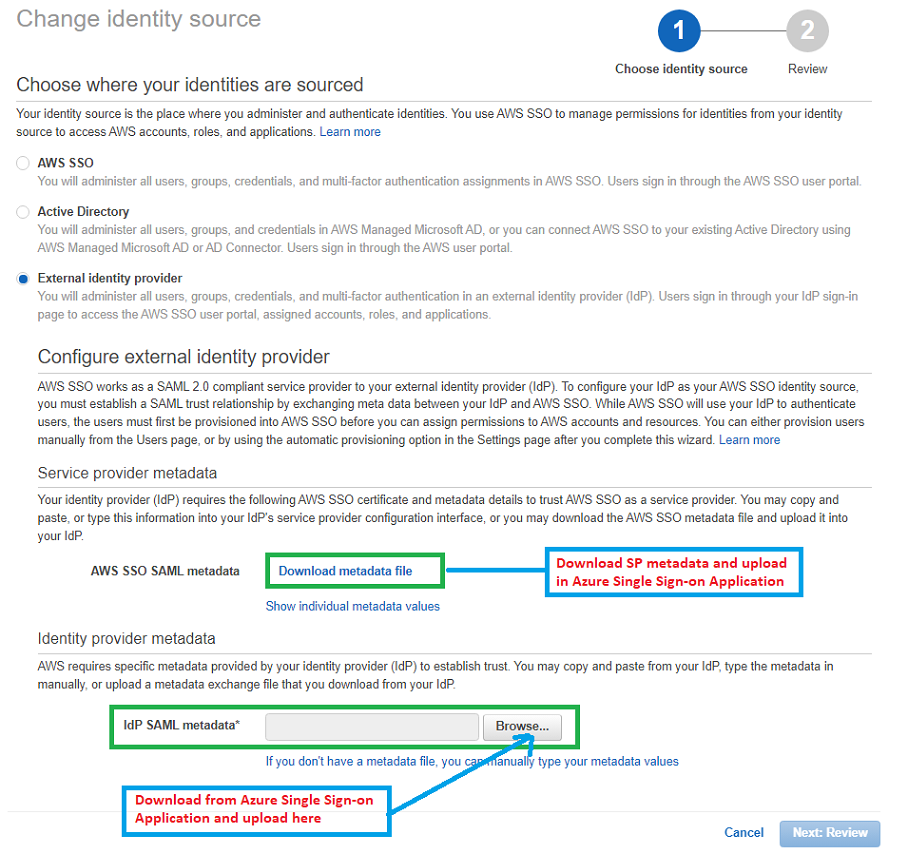
Go to AWS SSO, Settings, Identity Source and click Change. Select External identity provider. You will see the link to download AWS SSO Metadata (or SP metadata).
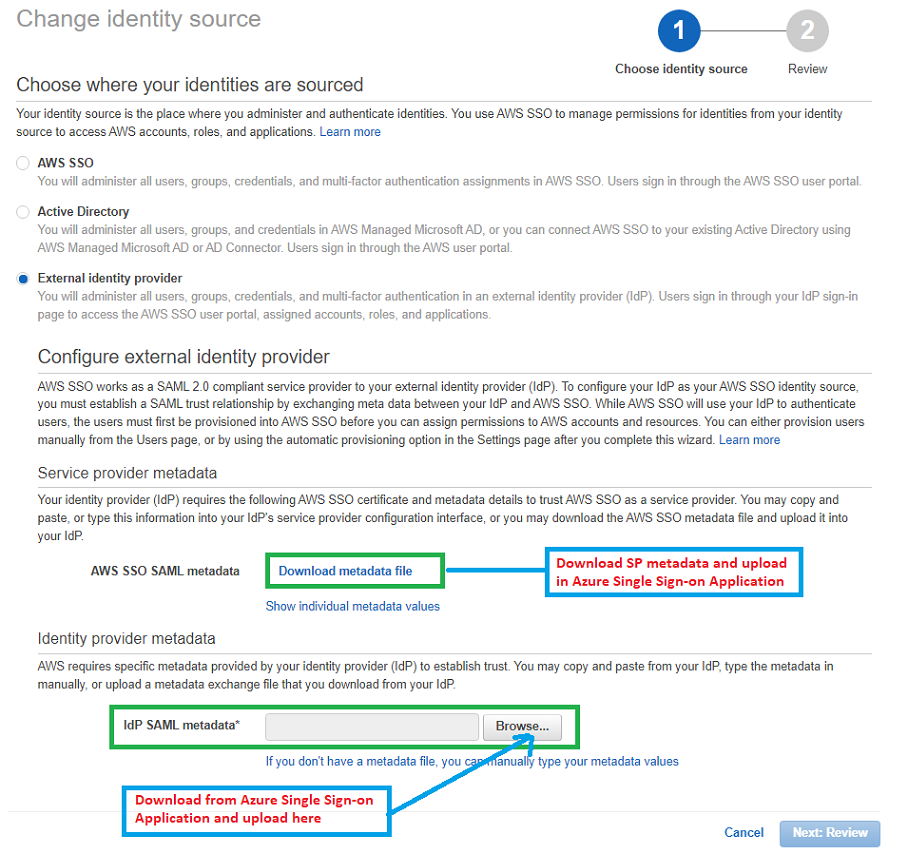
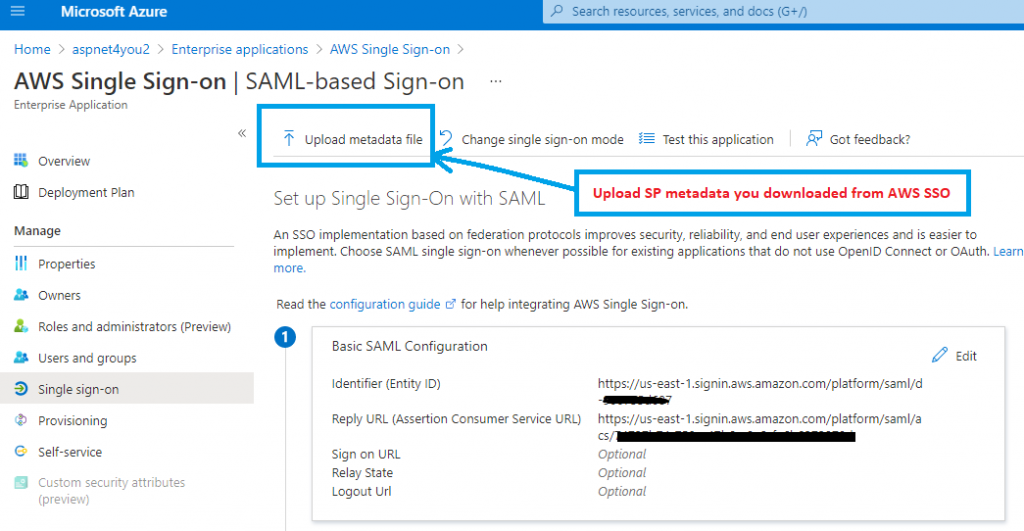
Now you go to Configure Azure AD SSO step of Azure AD enterprise application setup. Upload the SP metadata on Single Sign-on pane of Azure AD app-
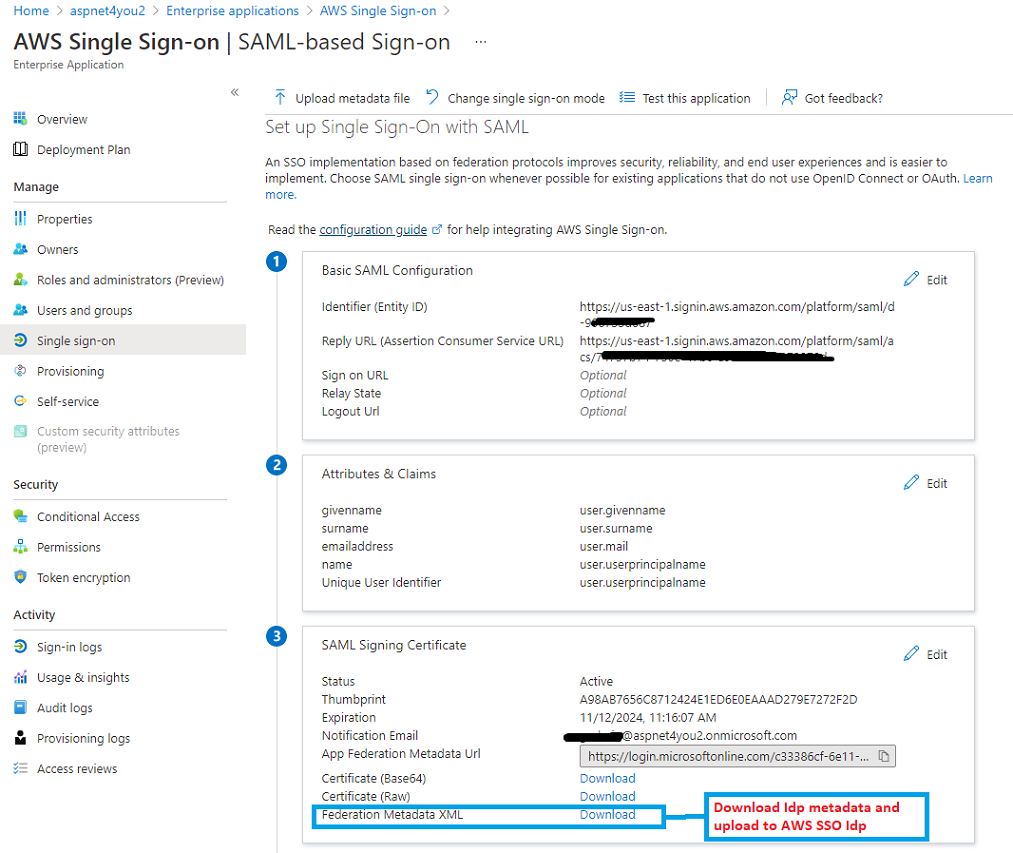
Next, we need to take IdP metadata from Azure and upload to AWS SSO. This approach is easier than manually filling out individual fields. We can do this step at Configure Azure AD SSO.
Let’s upload the IdP metadata in AWS SSO identity source settings (IdP SAML metadata link at the bottom)-
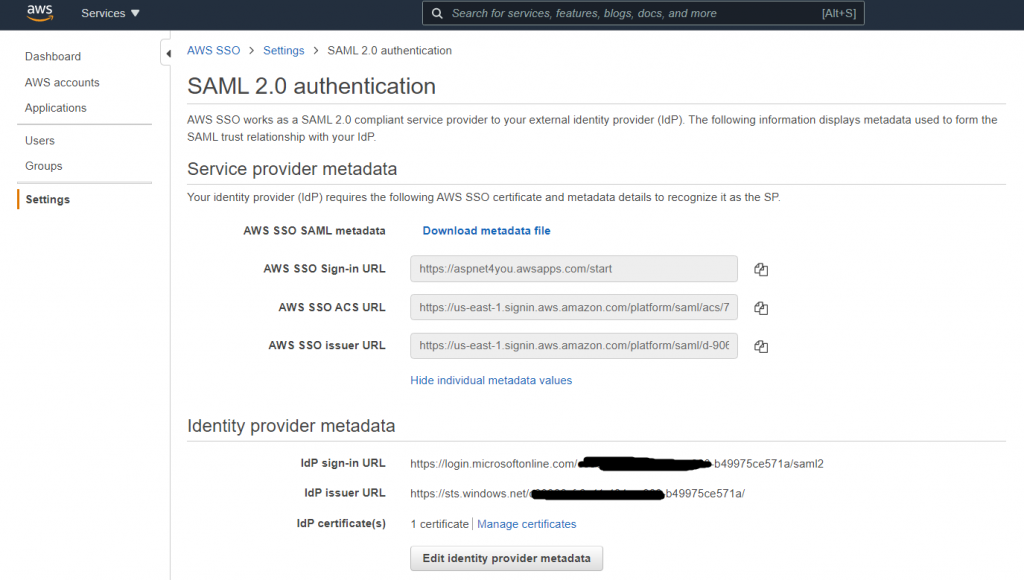
Once AWS SSO metadata is updated, you can find individual fields under SAML 2.0 Authentication-
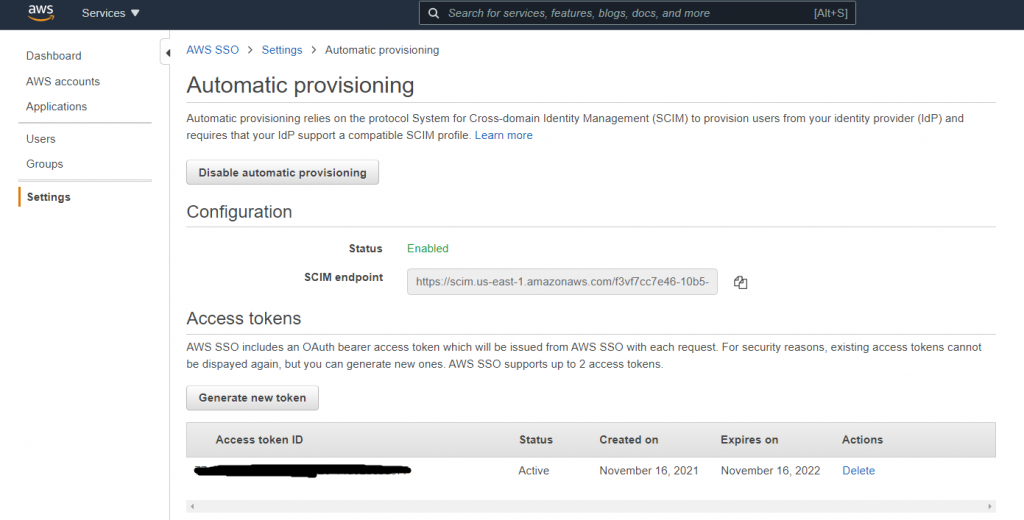
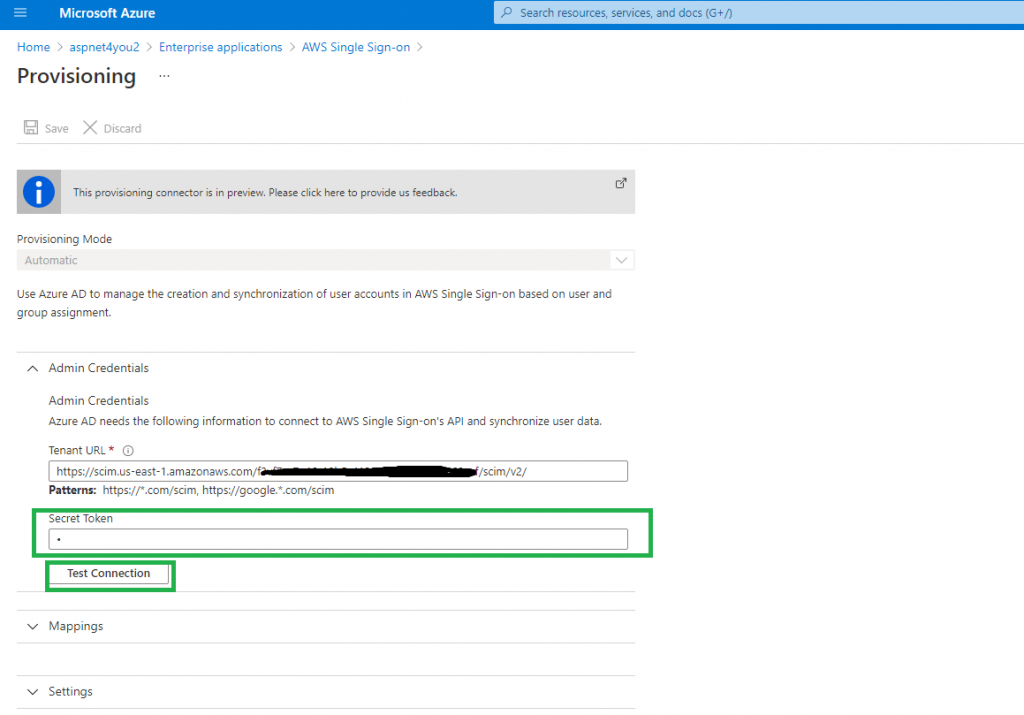
Automatic provisioning of users and groups from identity provider (Azure AD) is next step. AWS SSO needs to have user and group metadata and permission is assigned to users/groups. So, we need to configure Provisioning in Azure AD application. We need SCIM endpoint and access token from AWS SSO settings (automatic provisioning).
Configure Provisioning in AWS Single Sign-on application in Azure AD-
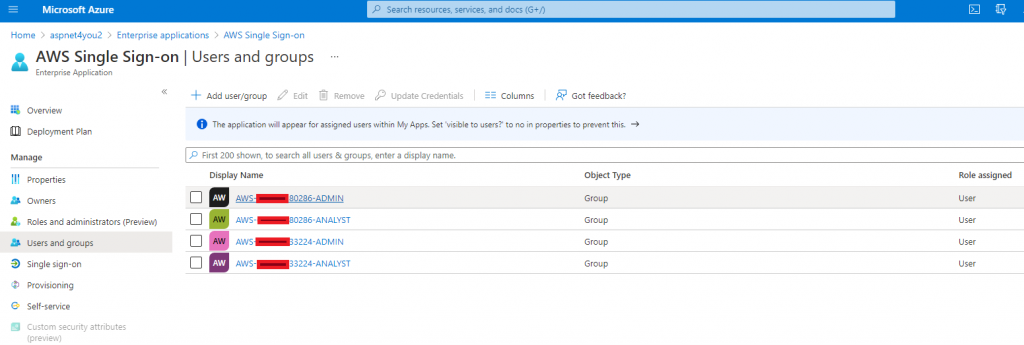
Not everyone in the organization requires federated access to AWS accounts. So, we will sync only users who indeed need access to AWS and we will use AD groups to better manage user population. We would not select any user directly in Azure AD app.
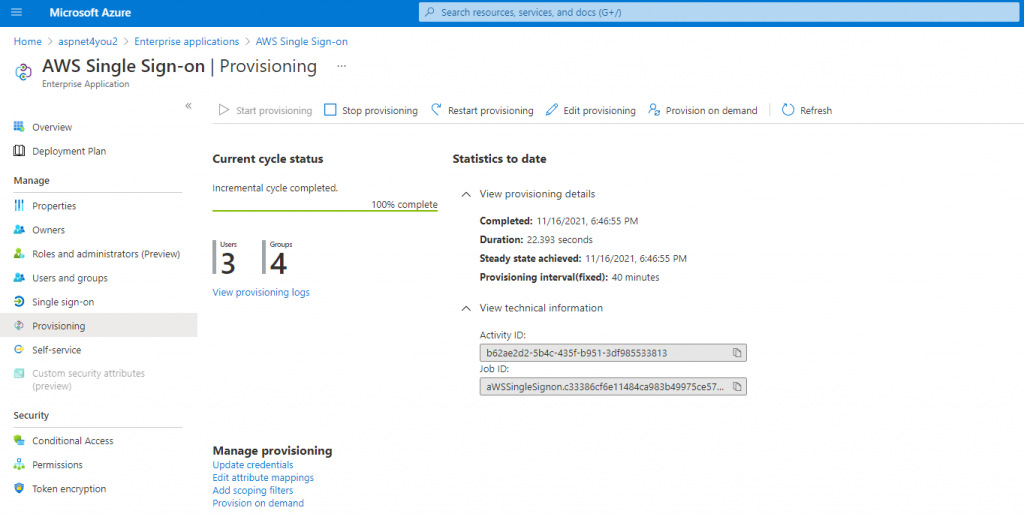
Now, we are ready to sync users/groups from Azure AD to AWS SSO. Let’s start provisioning in Azure AD. Just click Start provisioning and Azure will sync users/groups every 40 minutes. You can view the provisioning logs on Azure app. You can do on-demand provisioning as well but for this exercise we will adhere to normal schedule.
Allow few minutes to propagate users/groups in AWS SSO. Let’s check users/groups in AWS SSO-
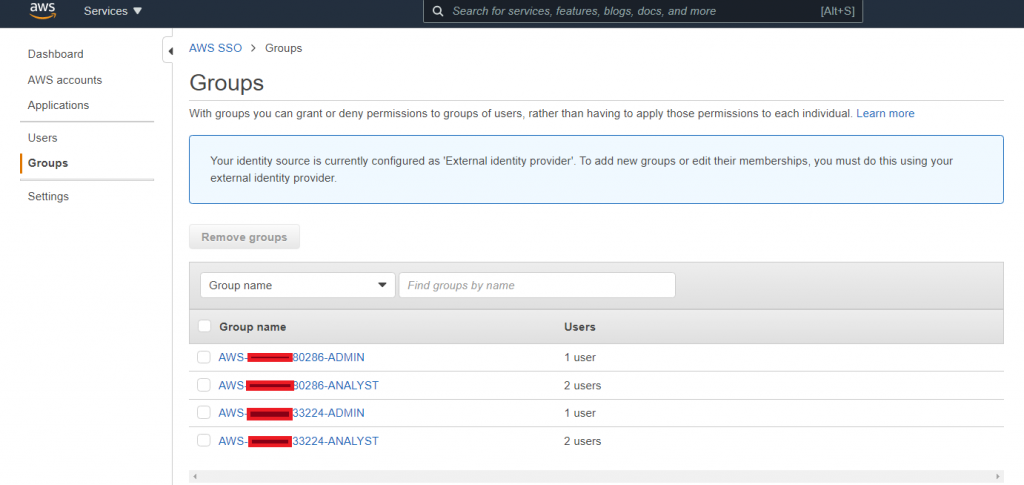
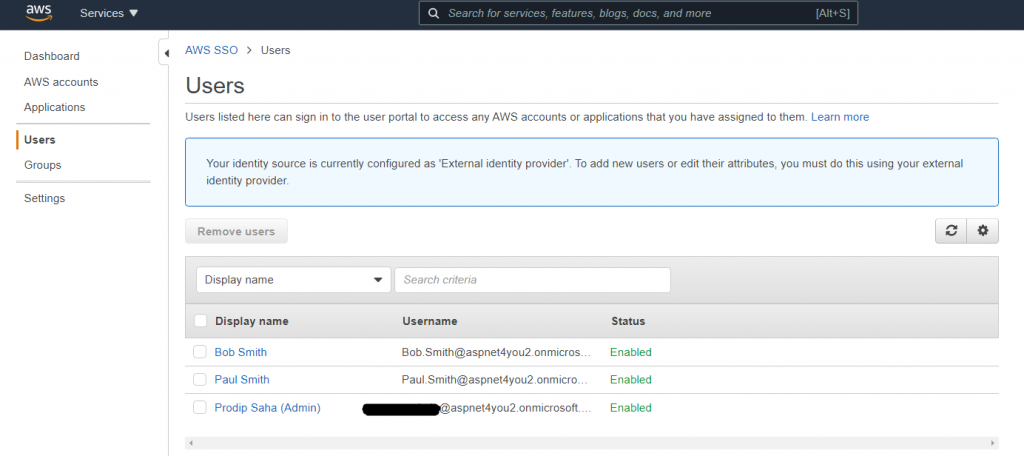
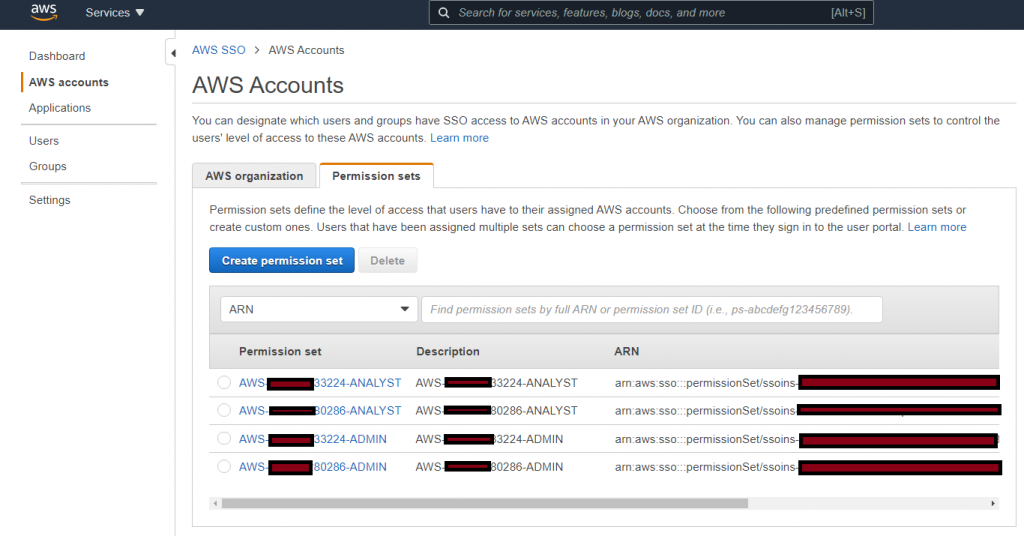
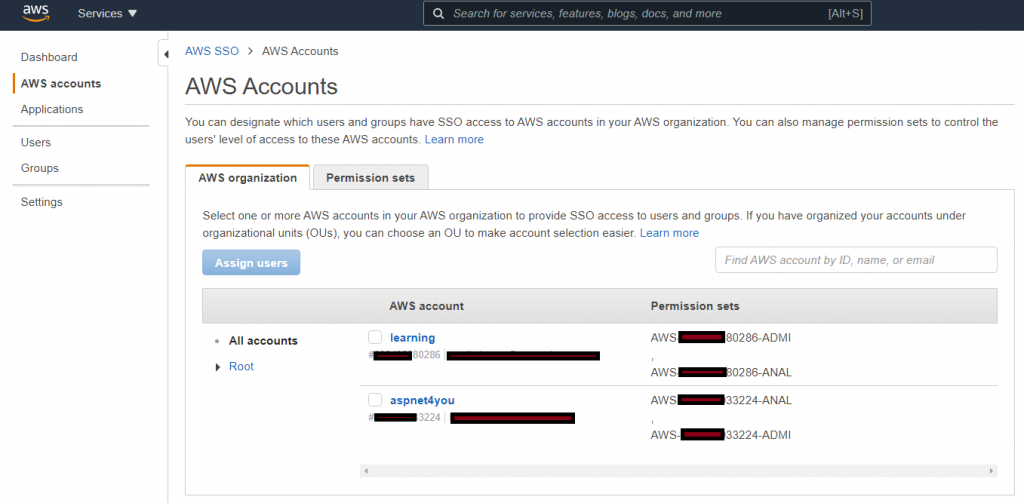
Okay, we have the groups in AWS SSO but they still don’t have any permission to access AWS resources in any AWS account. Our next step is the configure Permission Set in AWS SSO. To provide granular access control, we would create permission set for each account for each of the groups synced from Azure AD. As you can see, I have two AWS accounts in the organization and I have two personas (Admin and Analyst). So, I need four (4) AD groups created and added to Azure AD app.

Having permission set by itself does not do anything and we need to assign them to AWS Account. Permission set is assigned to AD group related to account.
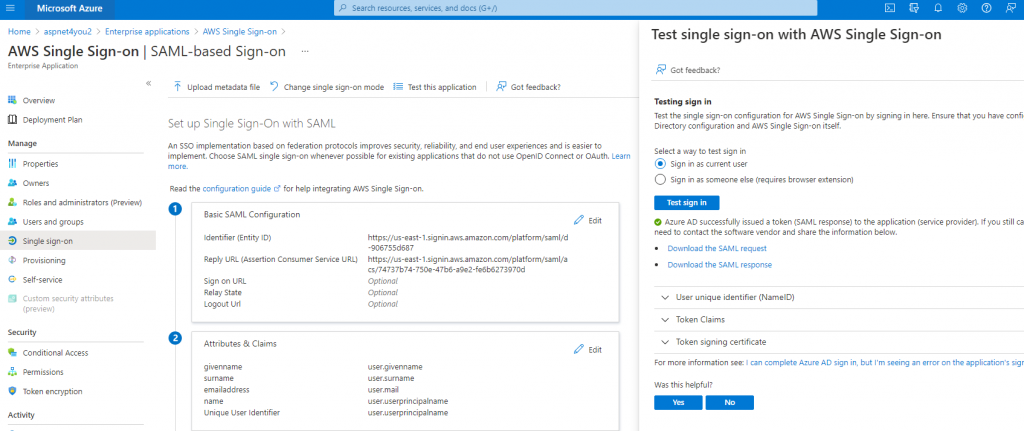
The necessary configurations are done and we are now ready to test SSO! AWS SSO supports both IdP and SP initiated login. At the beginning, we would use IdP initiated login at Azure AD application so that we an debug SAMLRequest/SAMLResponse and verify claims.
For production, we should be using SP initiated SSO and you can find the URL at User portal URL in AWS SSO. AWS allow you to customize this url and I have done for mine- https://aspnet4you.awsapps.com/start. You will be prompted by Azure AD to login. In this case, I have used login for Paul Smith who is member of two Azure AD AWS-[account]-Analyst groups. Paul would see options to login to two AWS accounts based on the permission mapping.
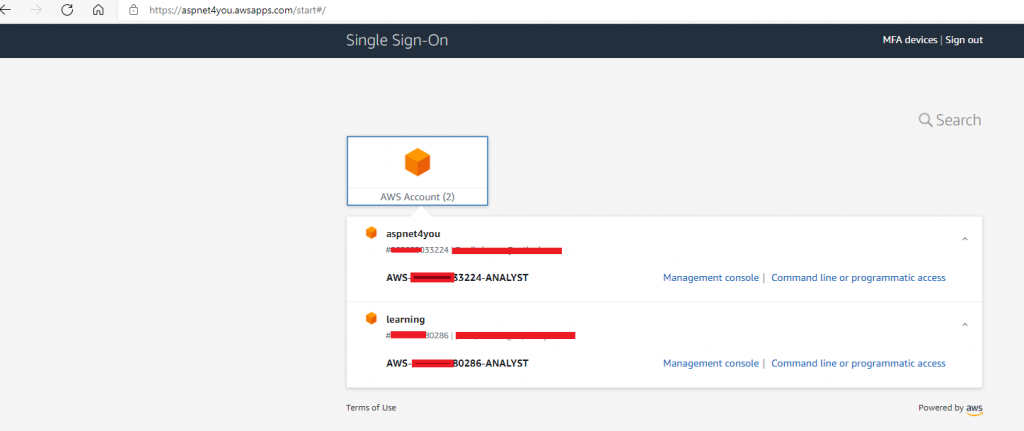
Wow! Paul Smith can login to AWS Account using credential validated by Azure AD. We have successfully tested Federated Login to AWS Account with Azure AD as IdP. Way to go!!

Happy AWS SSO and Azure AD IdP!
References-
